¶ Installation guide
This document provides step-by-step instructions for installing and configuring the XQv Recording software in combination with innovaphone PBX. It is intended for system administrators and technical users who are responsible for setting up and maintaining the application environment. Follow the procedures carefully to ensure a smooth and successful installation.
¶ Services and components
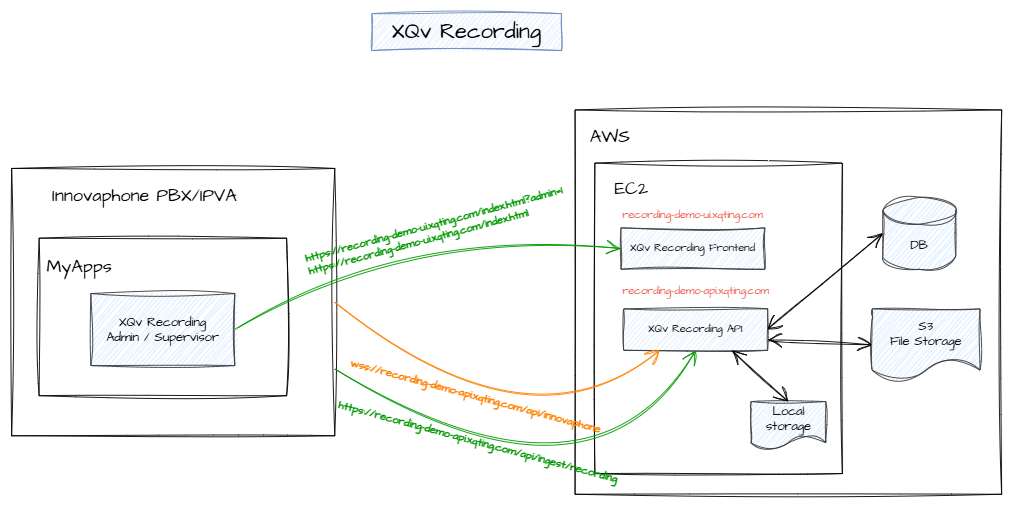
¶ Setting up the services
The XQv Recording services run in the cloud or as a service on premise.
There are 2 options:
- XQTING hosts the services for you in AWS (Amazon cloud).
- We deliver docker images so that you can install them in your cloud or on premise.
¶ Prepare innovaphone
¶ Define objects
First step is to define 3 objects
- XQv Recording Admin
- XQv Recording Supervisor
- XQv Recording backend
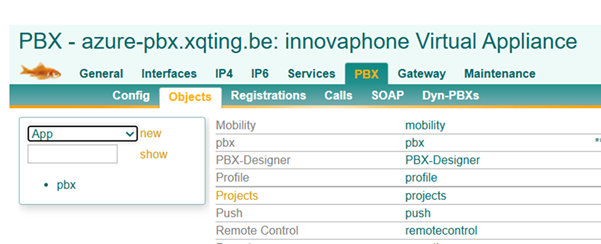
In myApps, select the “Devices” app. In the devices tab, select the PBX for which you want to enable recordings.
Go to “PBX” > “Objects” . In the dropdown, select “app” and press “new".
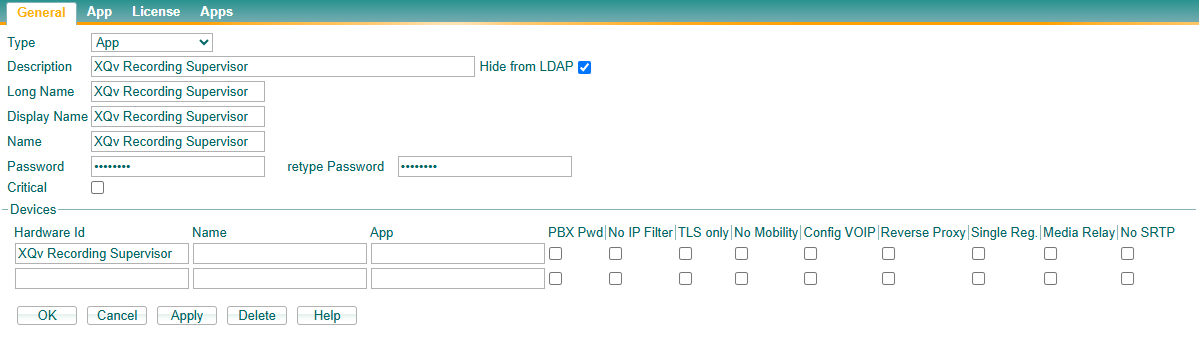
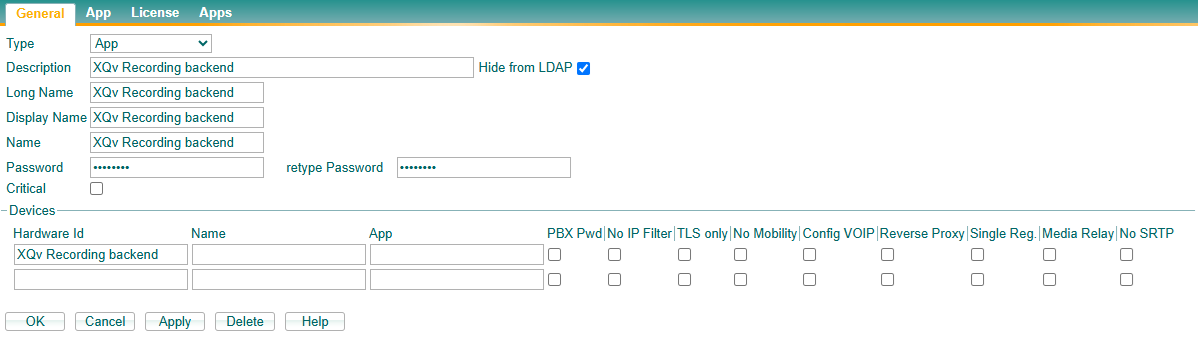
¶ XQv Recording Admin
For the first object you may use “XQv Recording Admin” as Description/Long Name/Display Name/Name.

Enter a password. Remember it because you will need to store it in the config of XQv Recording!
The Hardware Id is filled automatically.
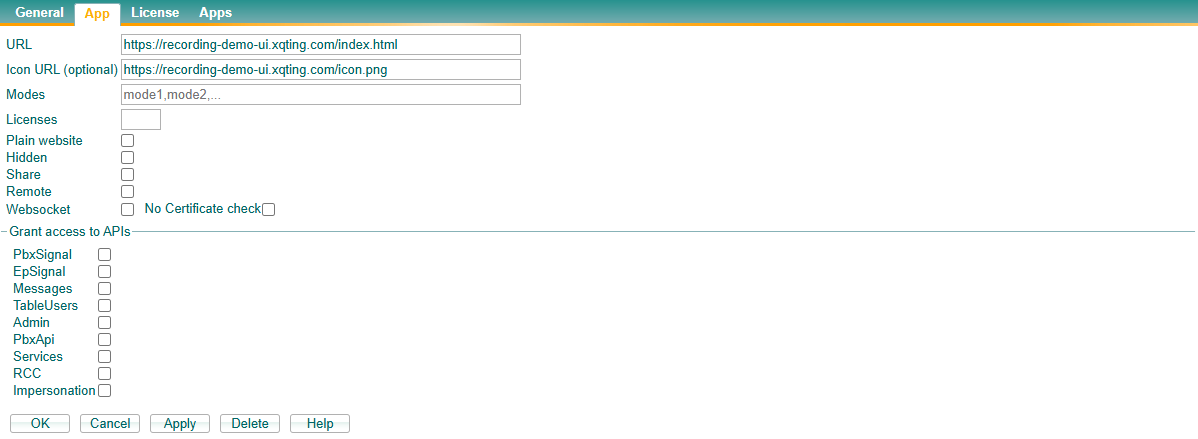
Next, go to the “App” tab and enter 2 URLs:
- URL: your AWS (or local) URL (refer previous section) followed by “/index.html?admin=1”
- Icon URL (optional): your AWS URL followed by “/icon.png”

No entering of data is needed in the “License” and “Apps” tab.
¶ XQv Recording Supervisor
Repeat the steps above.
General:
App:
The first URL is the same as above but without the parameter “?admin=1”
¶ XQv Recording backend
Repeat the steps once again.
In the App tab, put the correct URL: your AWS (or local) URL (refer previous section) followed by “/api/innovaphone/dummy.html
Make sure to mark “Hidden” and “Websocket” and grant access to all APIs.
“No Certificate check” should be left unselected.
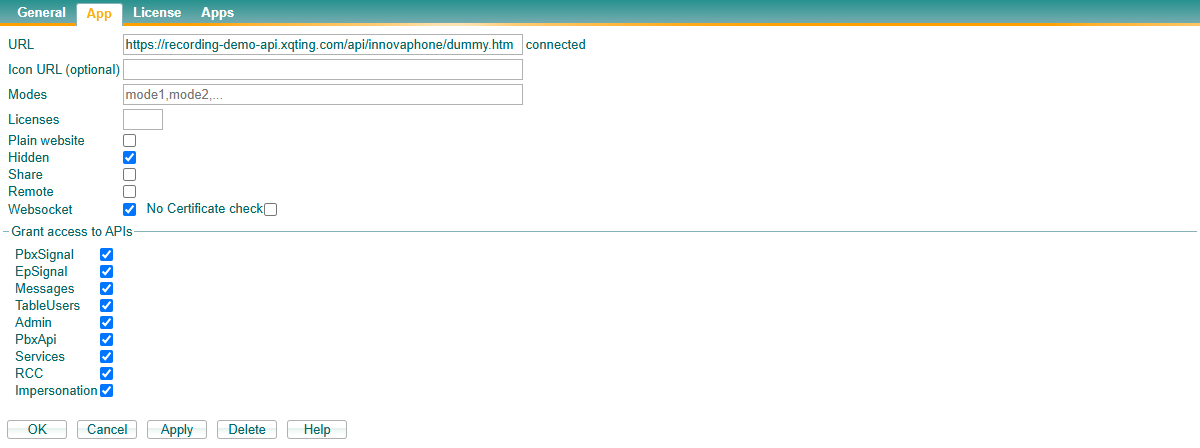
When the innovaphone PBX is connected with the backend, the word “connected” appears next to the URL field.
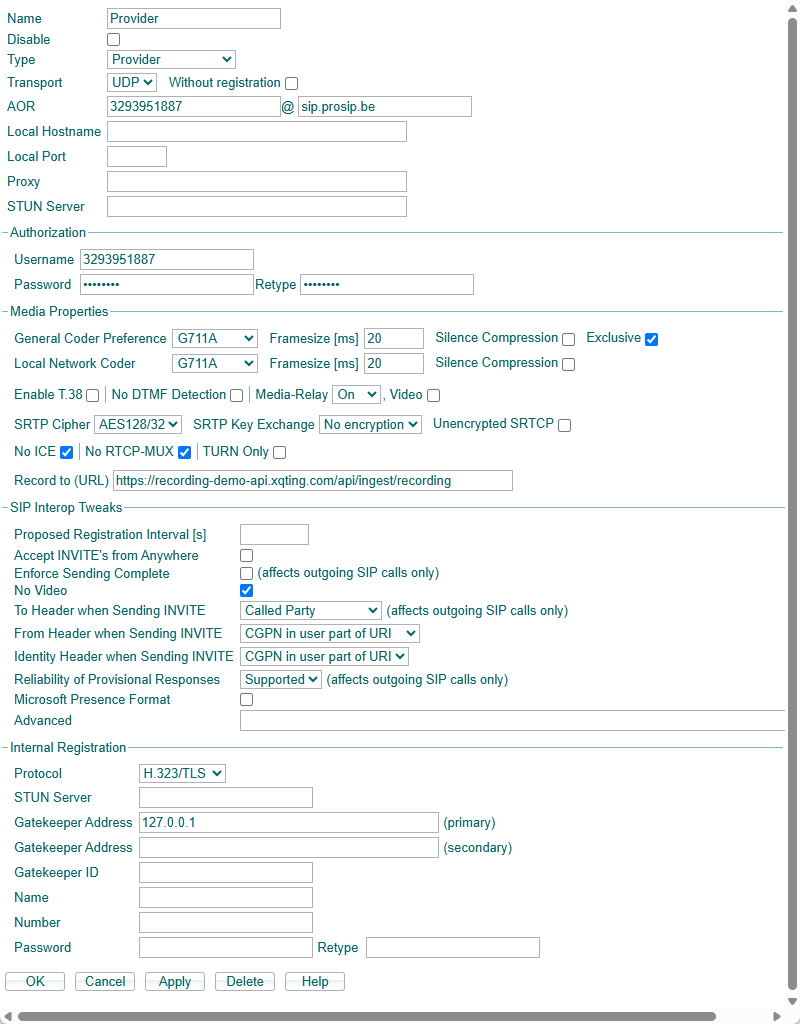
¶ Activate recording
Next step is to indicate where the recordings from innovaphone are to be sent to.
In the green innovaphone interface, select Gateway > SIP. Select the SIP provider.
Enter the “Record to (URL)” - in our example: “https://recording-demo-api.xqting.com/api/ingest/recording” - whereby the “api/ingest/recording” is fixed. The path in front is depending on your installation.
¶ Trust the Let's Encrypt root certificate
Once defined, the objects will try to connect, but will fail. Therefore you need to perform the next step.
Open the Devices app, go the Domains tab. Select the domain of your PBX and go to Device configuration. Open the Certificates configuration.
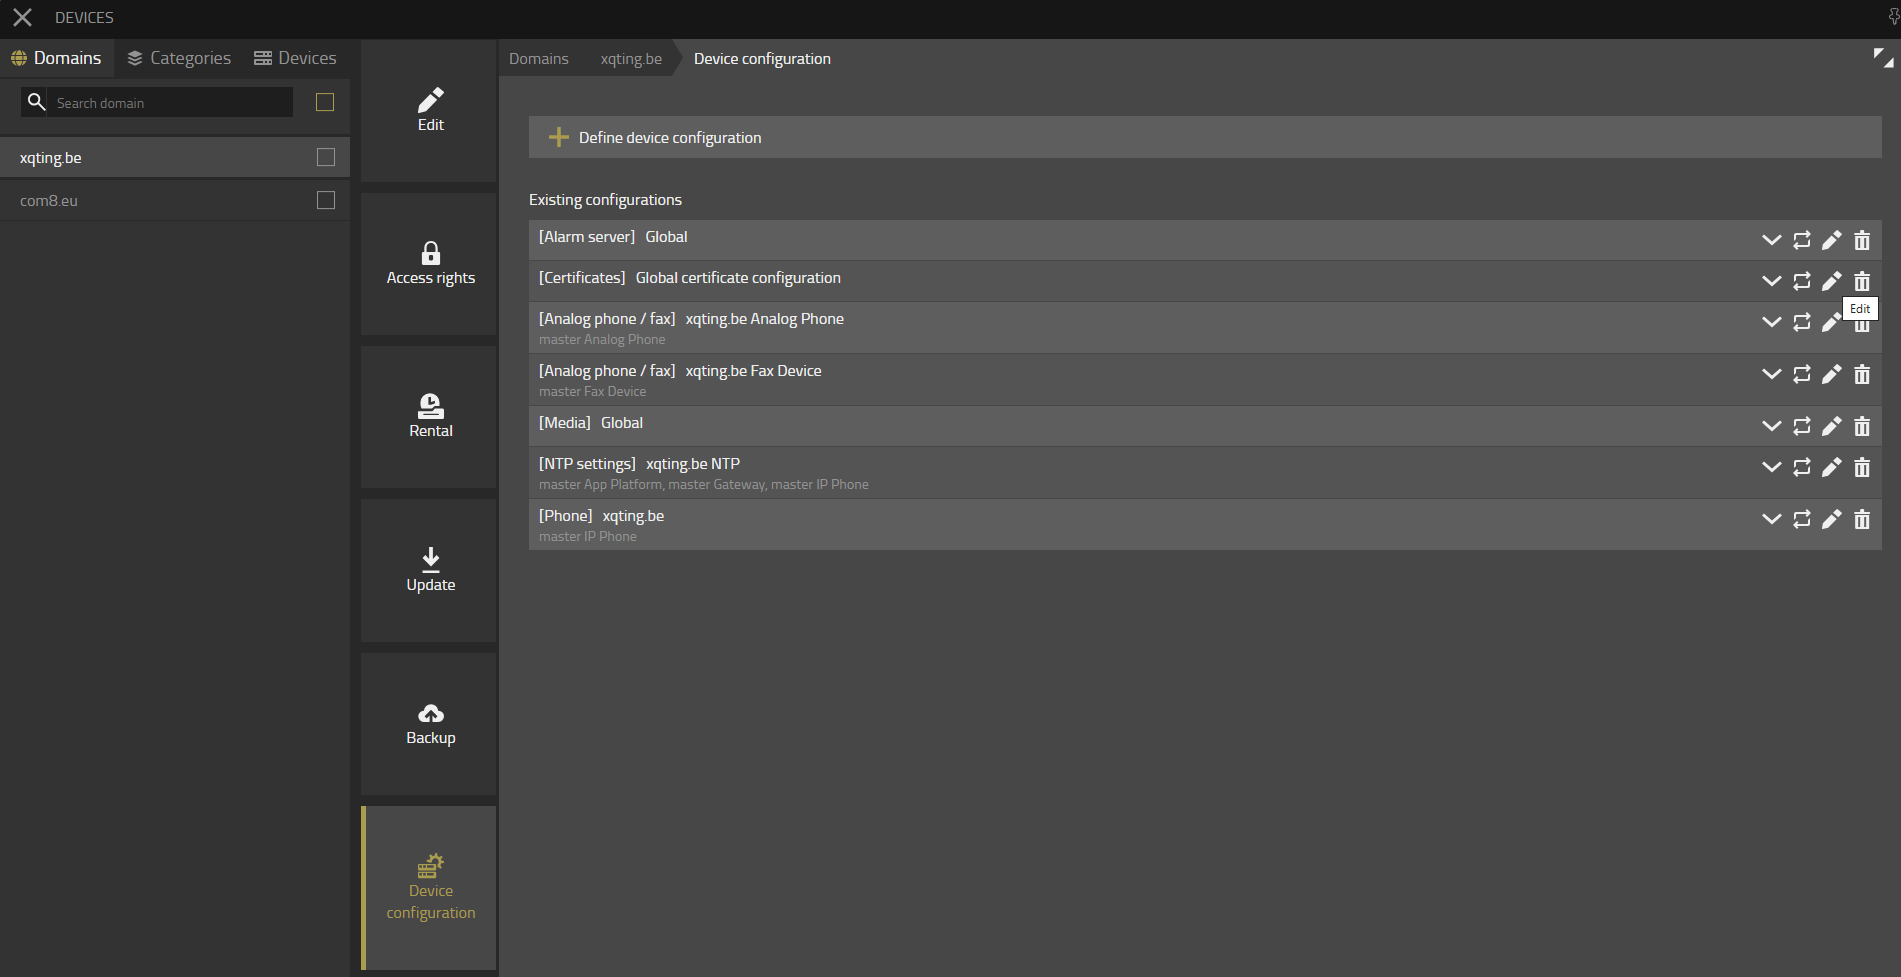
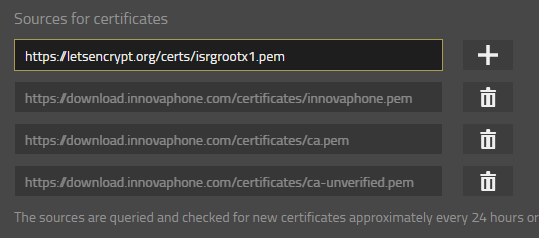
Inside the certificates device configuration, add https://letsencrypt.org/certs/isrgrootx1.pem into the “Sources for certificates” list and click +.
Now click the Ok button at the bottom of the page.
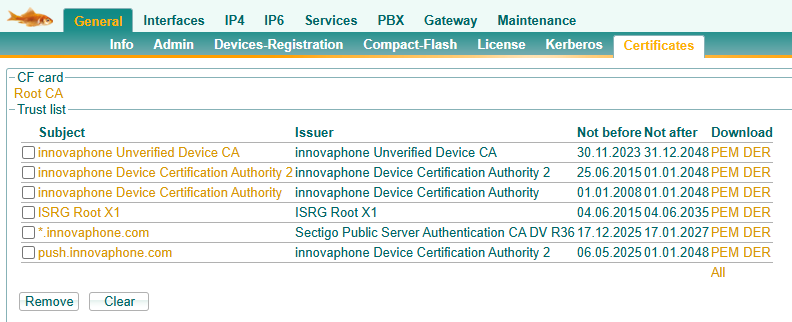
As a result, the Certificates overview of your PBX should now contain the ISRG Root X1 certificate from Let's Encrypt, and the websocket in the “XQv Recording backend” App object should be connected.
More information can be found on https://letsencrypt.org/certificates/ and https://wiki.innovaphone.com/index.php?title=Reference14r1:Concept_App_Service_Devices#Certificates_configuration.
¶ Configure the users
Finally you need to configure the users.
PBX > Objects > Show users
Select a user.
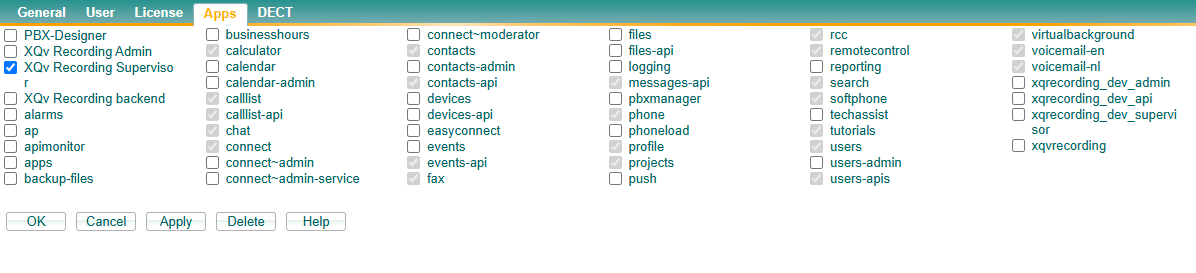
In the “Apps” tab - switch on “XQv Recording Admin” and or “XQv Recording Supervisor", depending on his role.
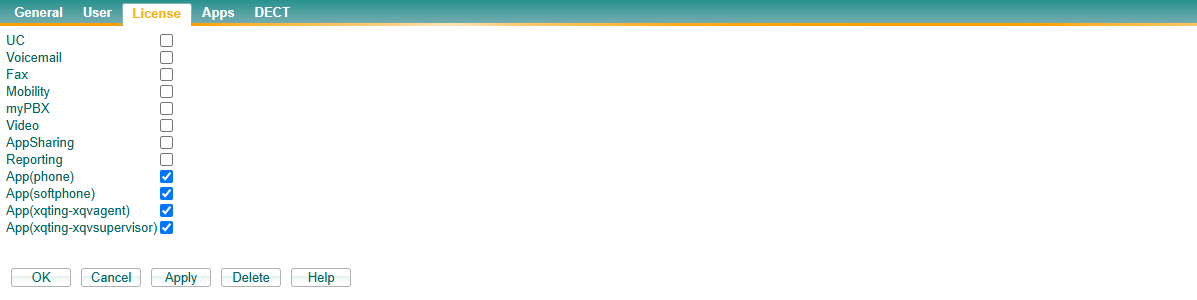
In the “License” tab - assign the XQv Recording licenses.
“App(xqting-xqvagent)” if you want to record the conversations of this person, AND/OR “App(xqting-xqvsupervisor)” if you grant this person access to the supervisor interface.
¶ Previous chapter